UV Pool Lamp Moisture Check: Keep Water Out of the Quartz Sleeve and Socket
| October 5, 2026
Disclosure: This article contains affiliate links. As an Amazon Associate, UV Pool Filter may earn from qualifying purchases.
A UV pool lamp moisture check is one of those small service habits that can prevent an expensive mess. The lamp may still glow, the controller may look calm, and the pool may seem fine, while a few drops inside the sleeve area are working toward corrosion, nuisance trips, or a failed lamp connection.
The goal is not to turn every pool owner into an equipment technician. It is to know what moisture clues matter, where the homeowner boundary ends, and why a dry quartz sleeve interior matters before a lamp is reinstalled.
Compare pool UV lamps, quartz sleeves, o-rings, gloves, and service supplies on Amazon. Match every replacement part to the exact brand and model before ordering.
Why moisture near the lamp matters
In many residential UV systems, pool water belongs outside the quartz sleeve while the UV lamp stays dry inside it. That separation is the whole point of the sleeve. When moisture shows up where the lamp, socket, or sleeve interior should be dry, it is a warning sign rather than a routine cleaning detail.
The Pentair BioShield UV installation and user’s guide tells owners not to handle the lamp or quartz sleeve with bare hands and includes inspection steps for the lamp, sleeve, seals, and vessel. CMP’s DEL AOP maintenance instructions specifically call out keeping the inside of the quartz tube dry before replacing the UV lamp. The Hayward HydraPure owner literature also treats lamp and quartz tube service as a defined maintenance procedure, not a casual guess-and-tighten job.
Check the simple clues before opening anything
Start with the outside of the unit. Look for dried mineral trails, drips below the lamp access area, water marks around end caps, a tripped GFCI, repeated controller warnings, or a lamp that fails soon after service. Those clues do not prove water is inside the sleeve, but they give you a reason to slow down before another lamp goes in.
Do this with the system running only for observation from a safe distance. Do not remove covers, loosen unions, or touch wiring while the pump or UV power is on. If the unit is wet around electrical parts, stop there and call a qualified pool professional or electrician familiar with pool equipment.
Use the manual sequence, not memory
Every model handles shutdown, pressure relief, draining, lamp removal, sleeve access, o-ring placement, and restart differently. Some units place the lamp access at the top. Some use end caps. Some AOP systems combine UV service with ozone components that add another layer of manufacturer restrictions.
Before any lamp comes out, find the exact manual for the installed unit and read the maintenance section. Confirm power is disconnected, pump operation is stopped, pressure is relieved, valves are set correctly, and the vessel is drained if the manual requires it. If the unit is installed below water level, valve isolation matters. If you cannot prove that water will stay out of the open chamber, this is professional-service territory.
What a dry inspection looks like
Once the unit is safely shut down according to its manual, the dry-side lamp area should not have standing water, beads of moisture, rusty staining, green corrosion, burned-looking socket marks, swollen seals, or a wet smell trapped around the lamp connector. The quartz sleeve interior should look clean and dry before the lamp returns.
Use clean gloves and a lint-free cloth. Avoid touching the lamp glass or sleeve with bare fingers because skin oils can reduce performance and create hot spots. If you see moisture inside the sleeve, do not wipe it away and pretend the problem is solved. Find the failed seal, cracked sleeve, loose retainer, damaged o-ring, or installation issue that let water reach the dry side.
- Photograph the lamp area before moving parts so you can compare seal position later.
- Check o-rings for cuts, flattening, grit, twisting, swelling, or missing lubrication if the manual specifies lubricant.
- Replace a cracked or chipped quartz sleeve instead of trying to reuse it.
- Let only approved parts and procedures near the lamp socket and sleeve seals.
- Record the inspection date with lamp age, controller messages, and any leak symptoms.
Do not chase moisture with force
It is tempting to solve a leak by tightening harder. That can crack a sleeve, deform an o-ring, or damage a retainer. It is also tempting to use household sealant around a suspect cap. That can create compatibility problems and make the next service worse. Follow the torque, seal, retainer, and replacement guidance in the manual. If the manual does not give an owner-level repair path, do not invent one.
Water balance is part of the prevention picture too. Scale and chemical drift can roughen service parts and make seals harder to inspect. Use the Pool Chemical Calculator to turn test readings into dosing math, or keep the tool handy on iPhone and Android. Balanced water will not repair a bad sleeve seal, but it makes future inspections more predictable.

When the answer is replacement
Replace parts when the manual calls for it, when the sleeve is cracked or cloudy inside, when o-rings are damaged, when lamp pins or sockets show corrosion, or when water returns after careful reassembly. Use genuine or manufacturer-approved parts where the manual requires them. A UV lamp is not a place to gamble on a part that almost fits.
Safety note: This is pool-care information, not medical advice or electrical instruction. Maintain the sanitizer level required for your pool and local rules, follow the equipment manual, and use qualified professionals for UV lamp service, quartz sleeve removal, leak diagnosis, pressure work, valve isolation, wiring, bonding, controller repair, chemical cleaning, and any task the manufacturer limits to trained service.
Recommended pool maintenance supplies
As an Amazon Associate, UV Pool Filter earns from qualifying purchases.

A clean cartridge helps protect flow through UV equipment and clears cloudy water faster.
View on Amazon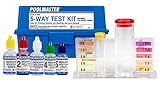
UV helps supplemental sanitation, but chlorine, pH, and alkalinity still need testing.
View on Amazon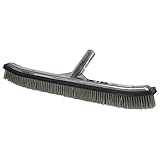
Brushing breaks up algae films and dead spots so sanitation and filtration work better.
View on AmazonFAQ
Is condensation inside a UV quartz sleeve normal?
No. The lamp side of the quartz sleeve is generally supposed to stay dry. If you see condensation, droplets, or water marks inside the dry area, follow the manual and look for a seal, sleeve, retainer, or installation problem before running the system again.
Can I dry the sleeve with a towel and reinstall the lamp?
Only drying the visible moisture misses the cause. The safe next step is to identify why water entered, inspect the sleeve and seals, and replace damaged parts according to the manufacturer instructions. If electrical parts were wet, bring in a qualified professional.
Will a wet lamp area trip the GFCI?
It can, but a GFCI trip can have other causes too. Treat any trip around pool UV equipment as a safety warning. Do not bypass the GFCI or repeatedly reset it until the equipment has been inspected through the manufacturer’s service process.
Should I replace the o-ring every time I replace a UV lamp?
Use the schedule and parts list for your exact model. Some manuals call for specific seal inspection or replacement steps during lamp or sleeve service. If an o-ring is flattened, cracked, swollen, dirty, or no longer seats cleanly, replacing it is cheaper than chasing a leak later.